Constantly Running Toilet Fixes in Gahanna OH Homes
A constantly running toilet in a Gahanna OH home is almost always caused by one of three things: a worn flapper that won't seal, a float set too high that lets water spill into the overflow tube, or a tangled or broken flapper chain. In most cases, you can stop the run in under 30 minutes with basic hardware store parts costing under $20. If adjusting and replacing those components doesn't stop the noise, the full flush valve assembly may need replacement. Here's how to diagnose and fix each cause, step by step.
Step 1: Confirm Where the Water Is Going
Remove the tank lid and set it safely aside. Watch the water level while the toilet runs. If water is spilling into the large center tube (the overflow tube), your float is set too high and water never stops filling. If the tank fills normally but drains slowly on its own, your flapper is leaking. Add a few drops of food coloring to the tank without flushing—if color appears in the bowl within five minutes, the flapper is confirmed as the source. Gahanna homes on the Columbus water system often see mineral buildup accelerate flapper wear, so this test matters.
Step 2: Adjust or Replace the Flapper
Turn off the water supply valve located behind or below the toilet, then flush to empty the tank. Unhook the old flapper from the two pegs on the flush valve seat and disconnect the chain from the flush handle arm. Take the old flapper to a hardware store—there are several home improvement options along Morse Road in Gahanna—and match the size. Snap the new flapper onto the pegs, reconnect the chain leaving about half an inch of slack, then turn the water back on and let the tank refill. Flush and watch. A proper seal stops the run immediately.
Step 3: Adjust the Float Height
If water was spilling into the overflow tube in Step 1, your float needs to come down. The target water level is about one inch below the top of the overflow tube. On a ball float (the old round ball on an arm), bend the arm gently downward or turn the adjustment screw at the base of the arm. On a cup float (the cylindrical style found on most modern fill valves), pinch the clip and slide the float down the fill valve shaft. Restore water and recheck. This fix is often overlooked but is one of the most common causes of running in Gahanna area homes with older toilets.
Step 4: Fix a Chain That's Too Short or Tangled
A flapper chain that's too short holds the flapper slightly open and lets water trickle constantly into the bowl. A chain with too much slack can get pinched under the flapper and create the same problem. With the water off and tank emptied, reattach the chain at a different link until you have roughly half an inch of slack when the flapper is fully seated. Trim any extreme excess with scissors so it can't loop under the flapper. This is a two-minute fix that solves a surprising number of running toilet calls. For more background on how your toilet's components work together, read this guide on toilet basics for homeowners.
Step 5: Replace the Fill Valve If Adjustments Fail
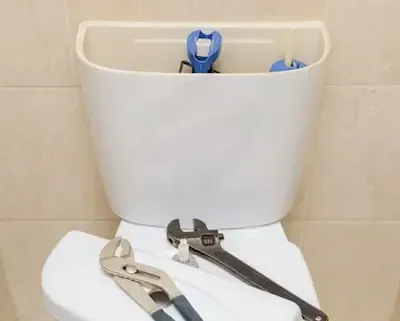
If the float is set correctly but the fill valve still hisses or runs intermittently, the valve itself is worn. Fill valve kits are widely available and universal kits fit most toilets. Shut off the supply valve, flush, and use a sponge to remove remaining water from the tank. Disconnect the supply line at the bottom of the tank with an adjustable wrench, then unscrew the locknut holding the old fill valve in place. Lift it out. Drop the new valve in, set the height so the critical level mark sits one inch above the overflow tube top, tighten the locknut hand-tight plus a quarter turn, reconnect the supply line, and turn water back on. Full replacement takes most homeowners under 20 minutes.
Step 6: Consider a Full Flush Valve Kit for Older Toilets
Toilets installed more than 15 years ago—common in Gahanna's established neighborhoods like Rocky Fork Estates and the areas around Creekside—may have corroded flush valve seats that no flapper will seal against properly. In that case, replacing the entire flush valve assembly or installing a complete tank rebuild kit (flapper, fill valve, and flush valve together) is more cost-effective than chasing repeated repairs. These kits run $25–$45 and eliminate all the internal components at once. If you're not comfortable draining and unbolting the tank, Toilet Repair handled by a local plumber is a straightforward service call that takes less than an hour.
Step 7: Test Thoroughly Before Calling It Done
After any repair, replace the tank lid and flush the toilet five to six times while watching the tank refill each time. Listen for any hissing after the tank is full. Let the toilet sit unused for ten minutes, then check the bowl for any slow water movement along the sides that would indicate continued leaking. Run the food coloring test one more time if you're unsure. A properly repaired toilet fills quietly, stops completely when the tank is full, and holds a stable water level between flushes. If it still runs after completing all steps above, the porcelain tank or bowl itself may have a hairline crack, which requires professional assessment.
